Getting Started With Traefik Proxy and HashiCorp Consul

HashiCorp Consul has established itself as one of the most popular service mesh solutions. It comes with service discovery, configuration, and segmentation into a single control plane. And all that without being locked to one single orchestrator or platform.
Traefik Proxy integrates with Consul and uses it as a provider to enable easy north-south traffic configuration. This complements the east-west service mesh that Consul service mesh provides while also sharing some architectural goals: being easy to configure, dynamic, and platform-agnostic. In Traefik Proxy 2.6, we also added support for Consul Namespace.
This tutorial demonstrates how to integrate Traefik Proxy with HCP Consul, leveraging the recently added namespace support on both the Consul and Consul Catalog Traefik providers.
Prerequisites
To follow through with this tutorial, you will need the following:
- HCP Consul instance or any Consul Enterprise v1.7+ environment
- Traefik Proxy v2.6 instance with access to the Consul network
- Enough rights to register and update applications on Consul
- A DNS domain name with a record pointing to Traefik Proxy (Optional)
This guide assumes the DNS entry .consul.traefiklabs.tech exists and points to a load balancer type service in a Kubernetes cluster. The cluster runs on AWS and is connected to the HCP Consul environment through a VPC Peering connection.
Step 1: Configuring Traefik Proxy
For the sake of testing, I will use two providers for different purposes — Consul Catalog used for service discovery and ingress configuration, and the Consul K/V provider for internal shared configurations, such as the Dashboard routing and any middleware definition.
To accomplish this yourself, you need to create two separate namespaces in Consul — apps and traefik, respectively.
Now you can create and apply the static configuration in our Traefik instance. It should look like this:
api:
  dashboard: true

entryPoints:
  web:
    address: ":80"
  websecure:
    address: ":443"

providers:
  consulCatalog:
    namespace: "apps"
    defaultRule: "Host(`{{ .Name }}.consul.traefiklabs.tech`)"
    endpoint:
      address: "<hcp-consul-address>"
      scheme: https
      token: <hcp-consul-token>

  consul:
    namespace: "traefik"
    rootKey: "traefik"
    token: <hcp-consul-token>
    endpoints:
      - "https://<hcp-consul-address>"
      ```
Note the use of a templating rule on the Host default rule. This will allow you to register automatically any application discovered by Consul Catalog with <service-name>.consul.traefiklabs.tech.
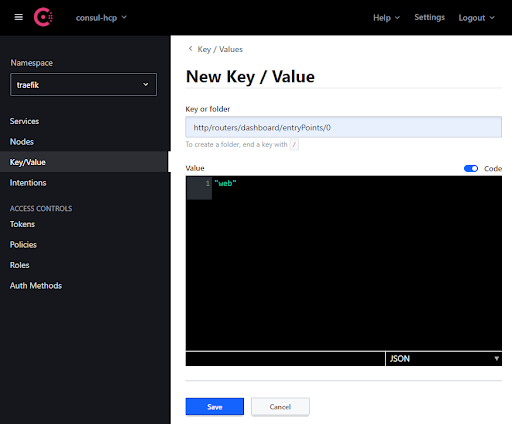
Once deployed, you can expose the Dashboard by creating the necessary key/values on Consul under the traefik namespace. This can be done from the CLI or from the Consul UI, as seen in the example below:
consul kv put -namespace traefik traefik/http/routers/dashboard/entryPoints/0 web
consul kv put -namespace traefik traefik/http/routers/dashboard/rule Host(`traefik.mydomain.com`)
consul kv put -namespace traefik traefik/http/routers/dashboard/service api@internal
Let’s also declare a middleware that you will use later on our demo application:
consul kv put -namespace traefik traefik/http/middlewares/stripfoo/stripPrefix/prefixes/0 foo
Here’s an example from the Consul UI:
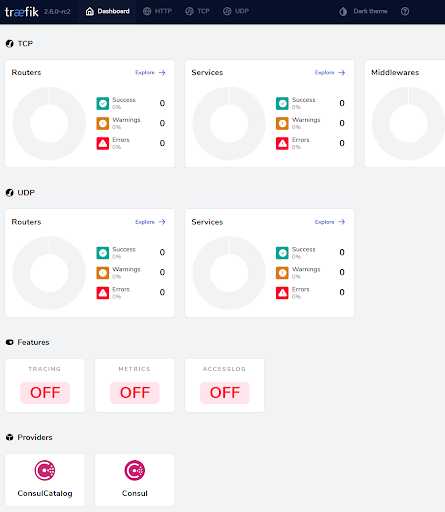
Now, let’s check that the Traefik Dashboard is available according to the routing configuration applied.
Step 2: Registering an application
This demo app is registered on Consul Catalog by specifying a few annotations to its service manifest. This will trigger Traefik in fetching its configuration, such as the exposed port and endpoints, while also looking at its own custom tags for more advanced configuration such as linking to a middleware, enabling TLS, and so on.
On Kubernetes, this is what it looks like:
#---
apiVersion: v1
kind: ServiceAccount
metadata:
  name: whoami
  namespace: apps
automountServiceAccountToken: true

---
apiVersion: v1
kind: Service
metadata:
  name: whoami
  namespace: apps
  annotations:
    consul.hashicorp.com/service-name: whoami
    consul.hashicorp.com/service-sync: "true"
    consul.hashicorp.com/service-tags: "traefik.enable=true,traefik.http.routers.whoami.middlewares=stripfoo@consul"
spec:
  ports:
    - protocol: TCP
      name: web
      port: 80
      targetPort: 80
  selector:
    app: whoami

---
kind: Deployment
apiVersion: apps/v1
metadata:
  name: whoami
  namespace: apps
  labels:
    app: whoami
spec:
  replicas: 2
  selector:
    matchLabels:
      app: whoami
  template:
    metadata:
      labels:
        app: whoami
    spec:
      serviceAccountName: whoami
      containers:
        - name: whoami
          image: containous/whoami
          ports:
            - name: web
              containerPort: 80
Consul also allows you to manually register services, which is useful when targeting legacy or standalone applications that are not running in an orchestrated environment. To register a service, first, you must declare its configuration in a JSON file, like the one below, then send a request to the Consul Catalog API to register it as a service.
Example payload:
{
    "Datacenter": "dc1",
    "ID": "c820fcd8-0460-5721-a3f5-d2a20bc0a74f",
    "Node": "server-1",
    "Service": {
      "ID": "whoami1",
      "Service": "whoami",
      "Tags": ["traefik.enable=true","traefik.application_name=whoami"],
      "Address": "10.0.0.100",
      "Port": 80
    },
  }
Example request:
curl \
    --request PUT \
    --data @payload.json \
    -H "X-Consul-Namespace: apps" \
    http://<my-consul-address>:8500/v1/catalog/register
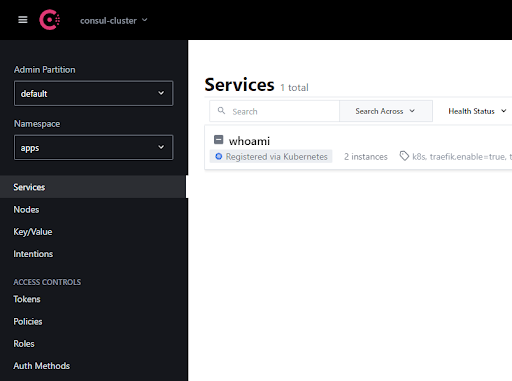
You can find more detailed information on how to register services in HashiCorp documentation, and here you can see the Consul UI service list:
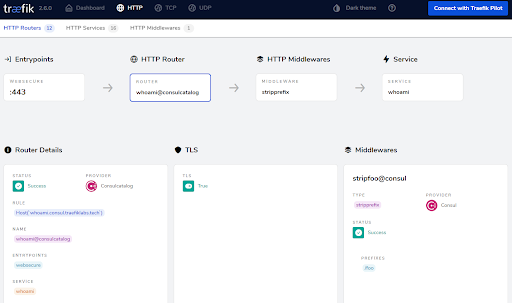
You should also register your application on Traefik Proxy and make it visible on the UI Dashboard:
Wrapping up
The diagram below shows an overview of the final stage of your environment.
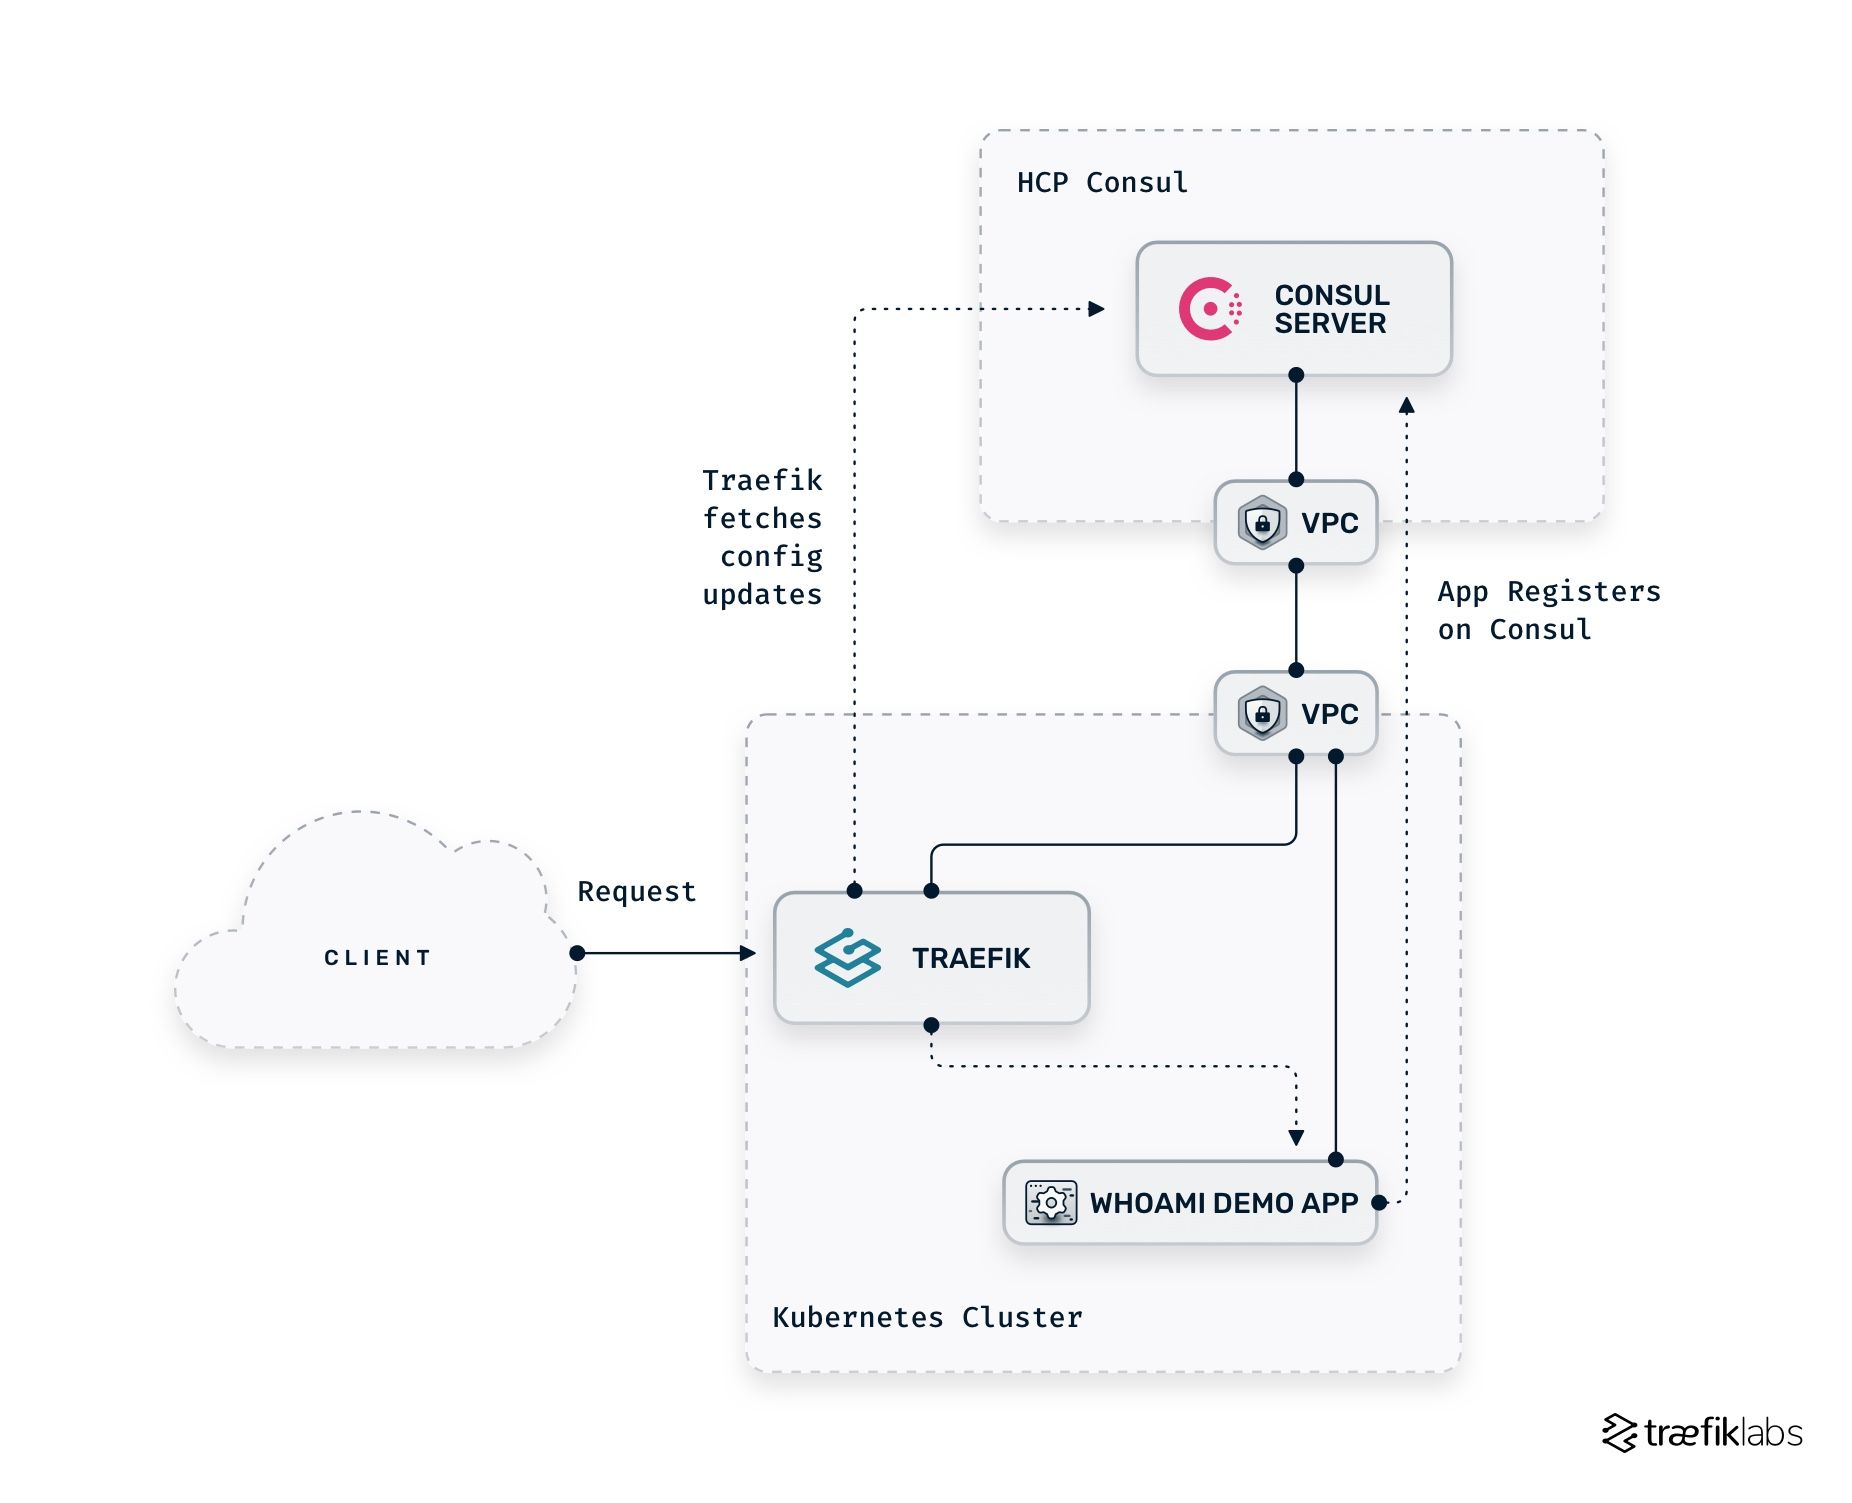
Once the base configuration is done, you can already feel it empowers your environment — you can easily expose your application by adding one label/annotation/tag. At the same time, you also benefit from manually adding routing rules, middleware, TCP options, and much more directly within Consul. All these are made possible by leveraging the provider namespace mechanism Traefik Proxy provides.
Next steps
Now that you’ve learned how to configure Traefik Proxy to use a HashiCorp Consul server as a configuration provider, you are ready to leverage its potential to handle service discovery and registration while using Traefik as the edge proxy.
If you want to learn more about the new features introduced in Traefik Proxy 2.6, check these articles:
- Announcing Traefik Proxy 2.6
- Traefik Proxy 2.6 and HTTP: Trust, Verification, and the Future
- How to use Traefik Proxy and HTTP/3 on AWS EKS
You can also watch on-demand our recent webinar, where we explored all the new features.
I also encourage you to visit other tutorials to learn more about Traefik and Consul:


