Boost your Homelab Setup with Traefik Hub Part I: Portainer

Over the last few years, container management evolved a lot. We got better tooling, more providers, and more hosting options. Still, publishing container-based applications can be complicated and stressful.
Now, imagine that you run a homelab setup based on Docker and Docker Compose, and you’re looking for a way to manage your container environment remotely. Traefik Hub is the way to go!
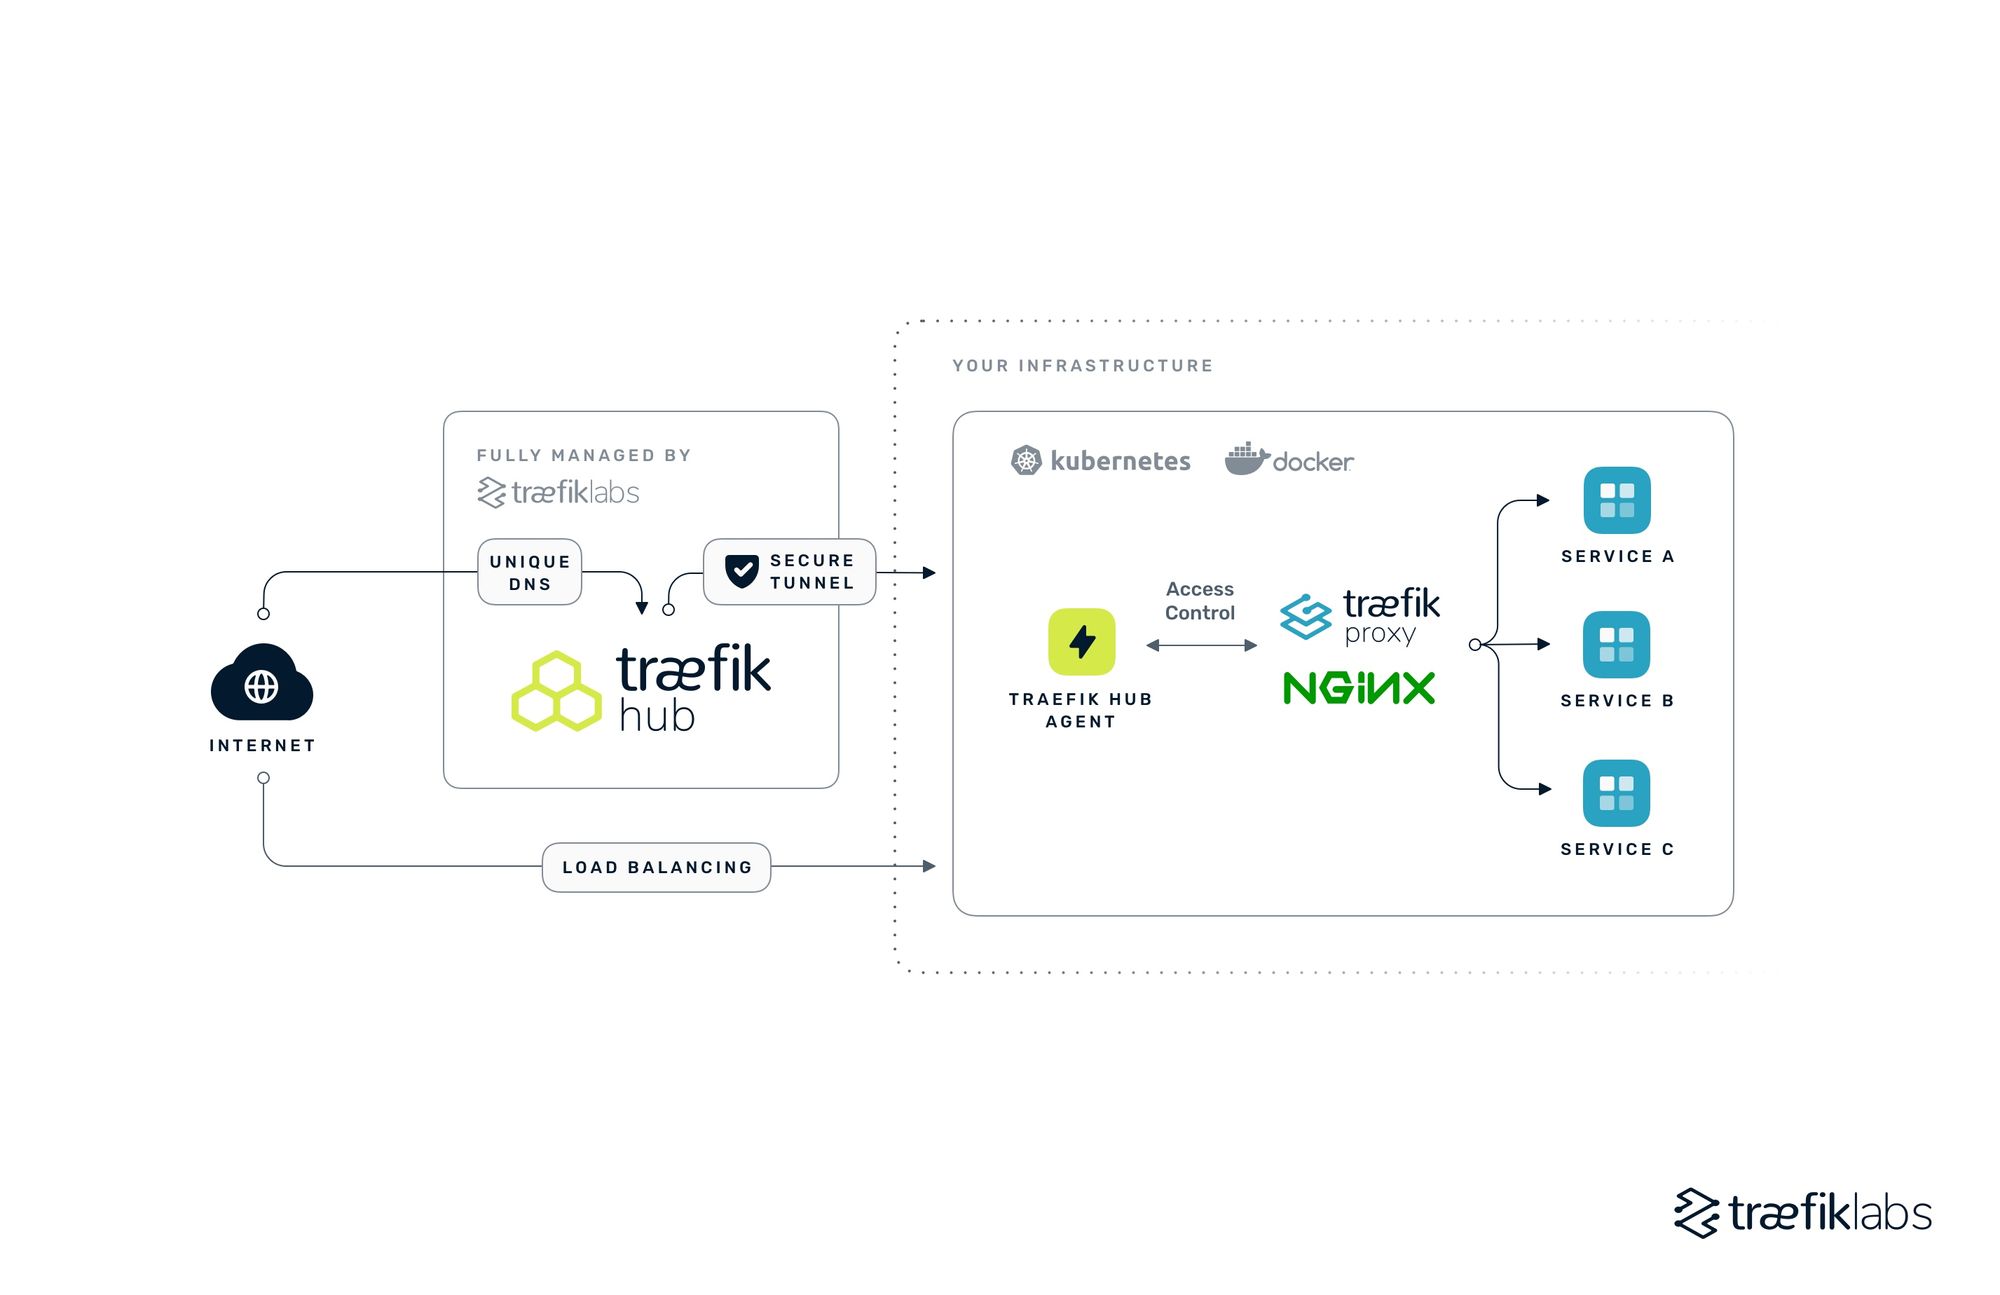
Traefik Hub is a cloud native networking platform that effortlessly publishes and secures containers at the edge instantly. It provides a secured gateway to your services running on Docker Swarm or Kubernetes, taking away most of the difficulties related to publishing and securing applications.
And while Traefik Hub is super simple and straightforward to use, I still think that it is important to provide you with tutorials on how to leverage Traefik Hub in a variety of scenarios.
In our homelab & Traefik Hub series, we are going to dive deeper into the use of Hub with different technologies and setups. The first use case we will be looking at today is how to use Traefik Hub to publish and connect to a locally running Portainer instance.
Let’s get right to it!

What is Portainer
Portainer is a lightweight, easy-to-use Web UI for container management that helps you manage your local and remote Docker hosts, and takes away the complexity of having to use a CLI (Command-line interface). It follows the KISS principle, is quick to set up, and is super easy to use. The fact that it is innately simple to use — and provides seamless integration and setup with Docker and Kubernetes — makes Portainer one of the most loved and trusted container technologies, both by the community and big companies.
Portainer offers two different editions, Community Edition (CE) and Business Edition (BE). For the purposes of this tutorial, I will be using the Portainer CE.
⚠️ Note: The example configuration I use in this tutorial is not suited for production, as I only use minimal configuration for my example setup. This article does not contain topics such as using the Portainer API or setting up multiple environments. Please do not use this example setup and configuration in production! Head over to the official Portainer documentation to learn more about best practices for setting up Portainer for production.
Prerequisites
To follow along with this tutorial, you will need the following:
- A registered account on Traefik Hub
- Docker, and Docker Compose installed on your machine
- Basic knowledge of using a Docker, Docker Compose, and a Command-line interface (CLI)
Note: This article is based on macOS; if you use Windows, you may need to adjust accordingly.
Step I: Installing the Traefik Hub agent
It is time to deploy Traefik Proxy and the Traefik Hub agent!
First, open a terminal and create a directory with the name portainer. This will be your working directory for this tutorial.
Log in to Traefik Hub and create your first agent by selecting Install my first Traefik Hub Agent and choose Docker-compose as Platform.

Once you are logged in and you have selected Docker-compose, the Traefik Hub UI will generate a code snippet with your token. Copy this code blog and paste it into your open terminal window.
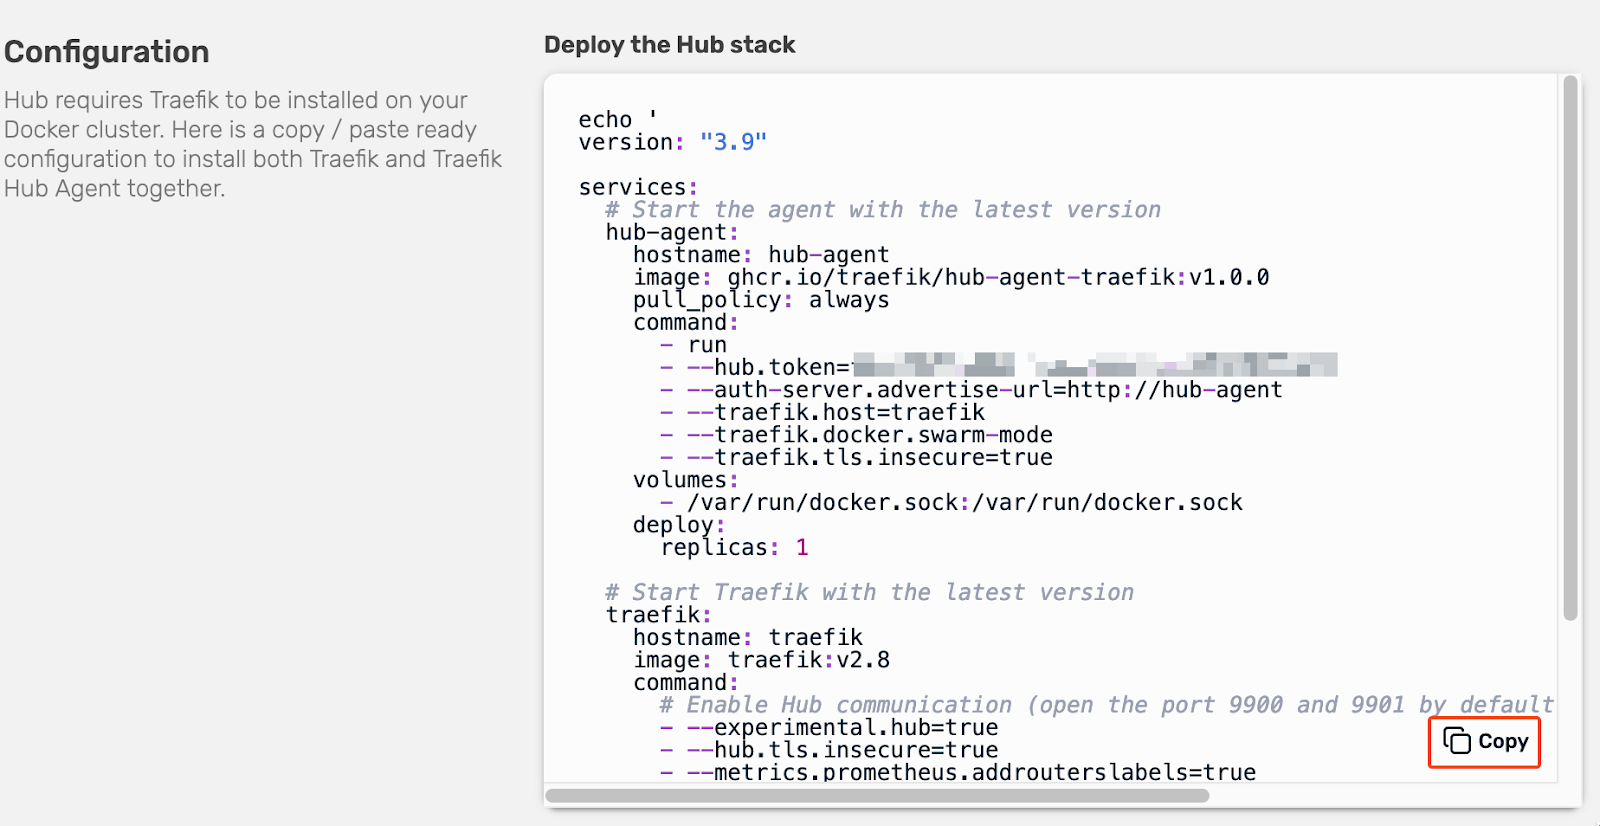
This will create a Docker Compose file called docker-compose-hub-agent.yaml and will start the Traefik Proxy and agent containers in background mode.
Your project structure in the terminal should look like this:
├── portainer
│   ├── docker-compose-hub-agent.yaml
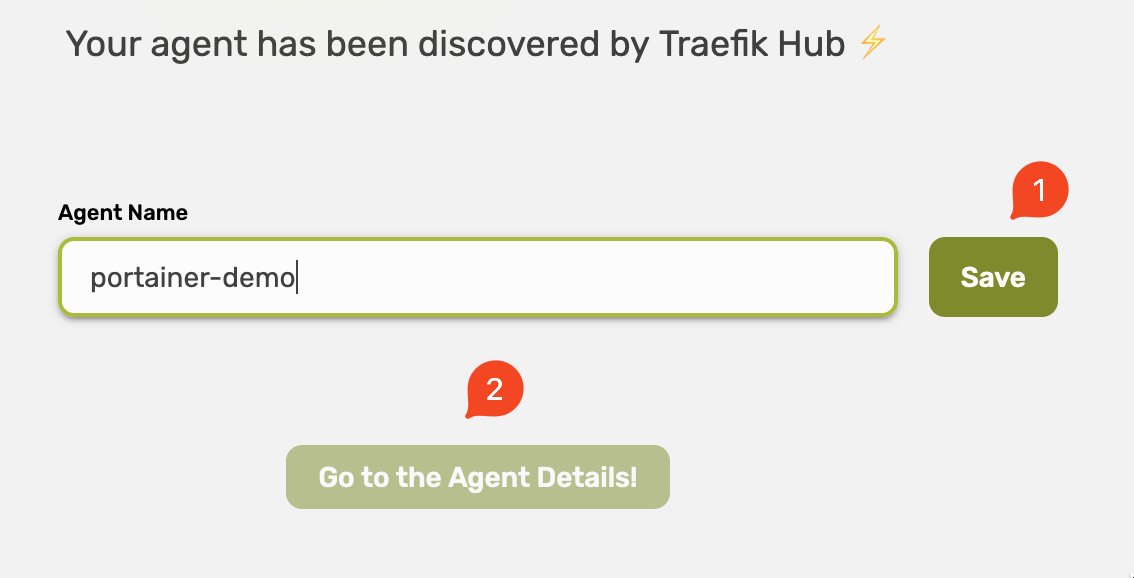
Name the agent and save it, then select Go to the Agent Details.
I highly recommend you use a name that clearly identifies the service, but, of course, this is up to you and you can use whatever name you like!
Step II: Setting up Portainer
Inside the Portainer directory you created earlier, create a file called docker-compose-portainer.yaml and save it. At the time of writing, the latest Portainer version is 2.17.1.
version: "3.9"
### Services ###
services:
  # Portainer
  portainer:
    # Use the Portainer image (Community Edition) v2.17.1 (at time of writing)
    image: "portainer/portainer-ce:2.17.1"
    # Specify a custom container name, rather than a generated default name.
    container_name: portainer
    # Run an init process (PID 1) inside the container that forwards signals and reaps processes.
    init: true
    # Restart a container irrespective of the exit code but will stop restarting when the service is stopped or removed
    restart: unless-stopped
    # Prevent the application processes inside the container from gaining new privileges during runtime
    security_opt:
      - "no-new-privileges:true"
    ports:
      # Make HTTPS port (9443) reachable from localhost
      - "9443:9443"
    expose:
      # Expose HTTP port (9000) to make it accessible for other containers in the same network
      - "9000"
    volumes:
      # Add Docker as a mounted volume, so that Traefik can read the labels of other services
      - "/var/run/docker.sock:/var/run/docker.sock:ro"
      # Mount the local Portainer portainer_data directory to the data directory of the container
      - "./portainer_data:/data"
    networks:
      - portainer_traefik-hub

### NETWORKS ###
networks:
  portainer_traefik-hub:
    external: true
This Docker Compose file will start a Portainer container based on the Portainer Community Edition (v2.17.1). It mounts port 9443 (HTTPS) to your localhost, and it exposes port 9000 (HTTP) to other containers in the same network.
It also mounts the docker.sock file and the local portainer_data directory (created by Docker Compose) for data persistence.
Your project structure should look like this:
├── portainer
│   └── docker-compose-portainer.yaml
│   └── docker-compose-hub-agent.yaml
Excellent! You created the base structure and your first configuration file is in place. Now, let’s start the Portainer instance and get ready to set it up.
To start the container, run the following command in the terminal. It will start the container in detached (background) mode.
docker-compose -f ./docker-compose-portainer.yaml up -d
Depending on your machine and network connection, this will take a moment. You can check to see whether the Portainer container has started by running docker ps.
CONTAINER ID   IMAGE                           COMMAND        CREATED         STATUS         PORTS                                                           NAMES
ddfd5c0076d9 portainer/portainer-ce:2.17.1 "/portainer" 9 seconds ago Up 8 seconds 8000/tcp, 9000/tcp, 0.0.0.0:9443->9443/tcp portainer
After you have confirmed that the container is running, browse to https://localhost:9443 and follow the steps in the browser to finish the initial Portainer setup.
Note: Portainer uses a self-signed SSL certificate to secure the web interface via HTTPS. Because of this, you will see a warning in your browser window.
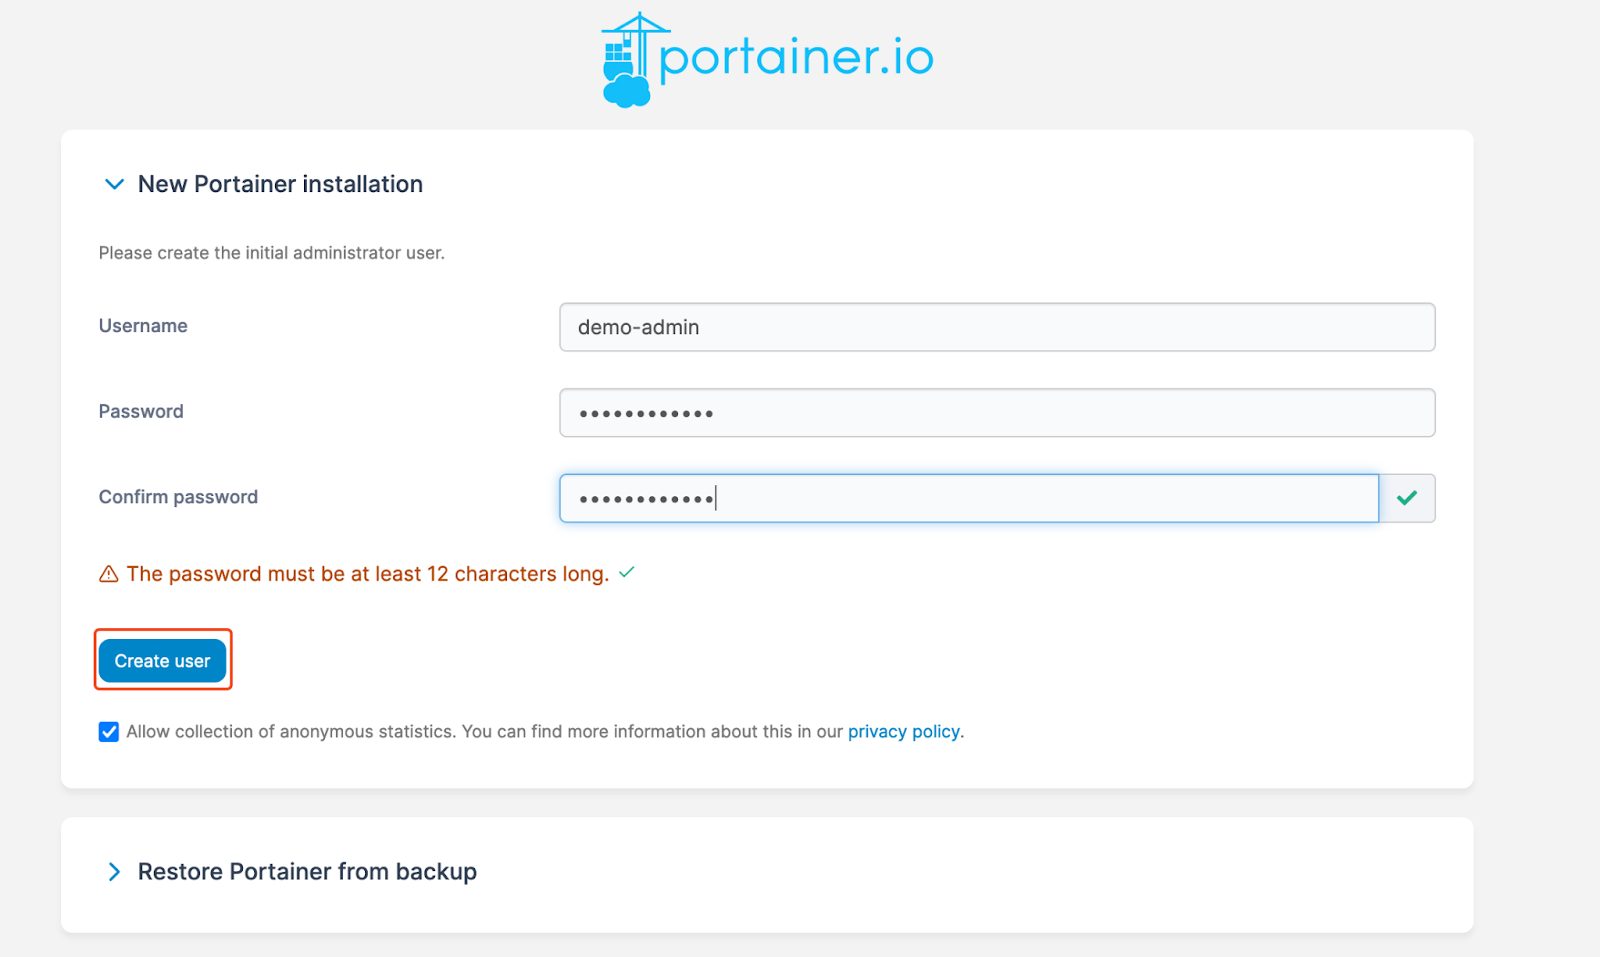
In the next steps, you need to create the base configuration for Portainer. For more information about the configuration, please refer to the official Portainer documentation about the initial configuration.
Choose a username and a secure password, and select Create user.
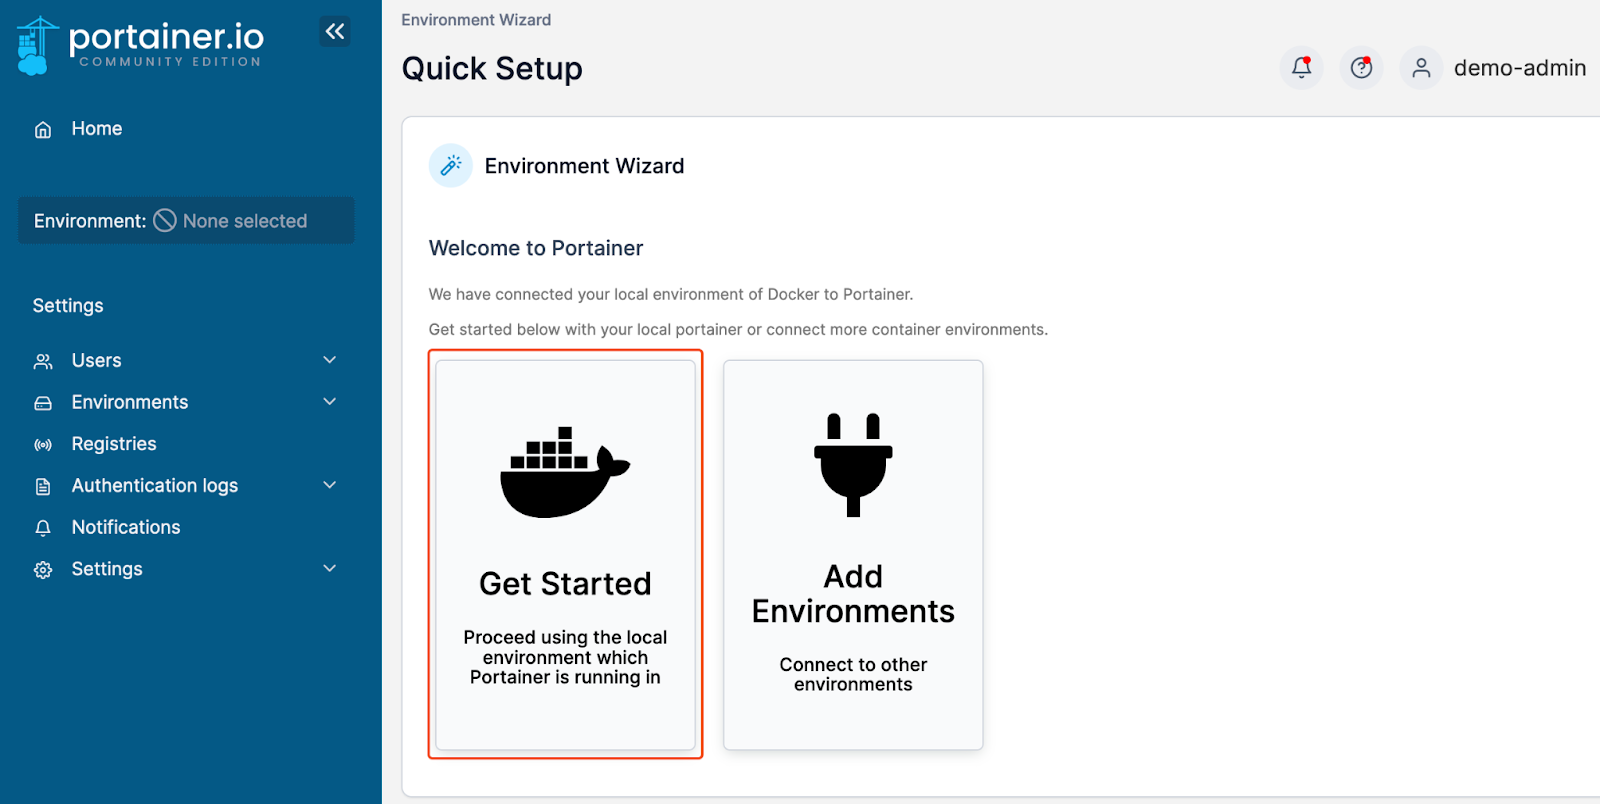
Select Get Started in the dashboard to start using Portainer with your local Docker environment. The installation process automatically detects your local environment and sets it up.
Once installation is complete, your local Docker environment shows your containers.
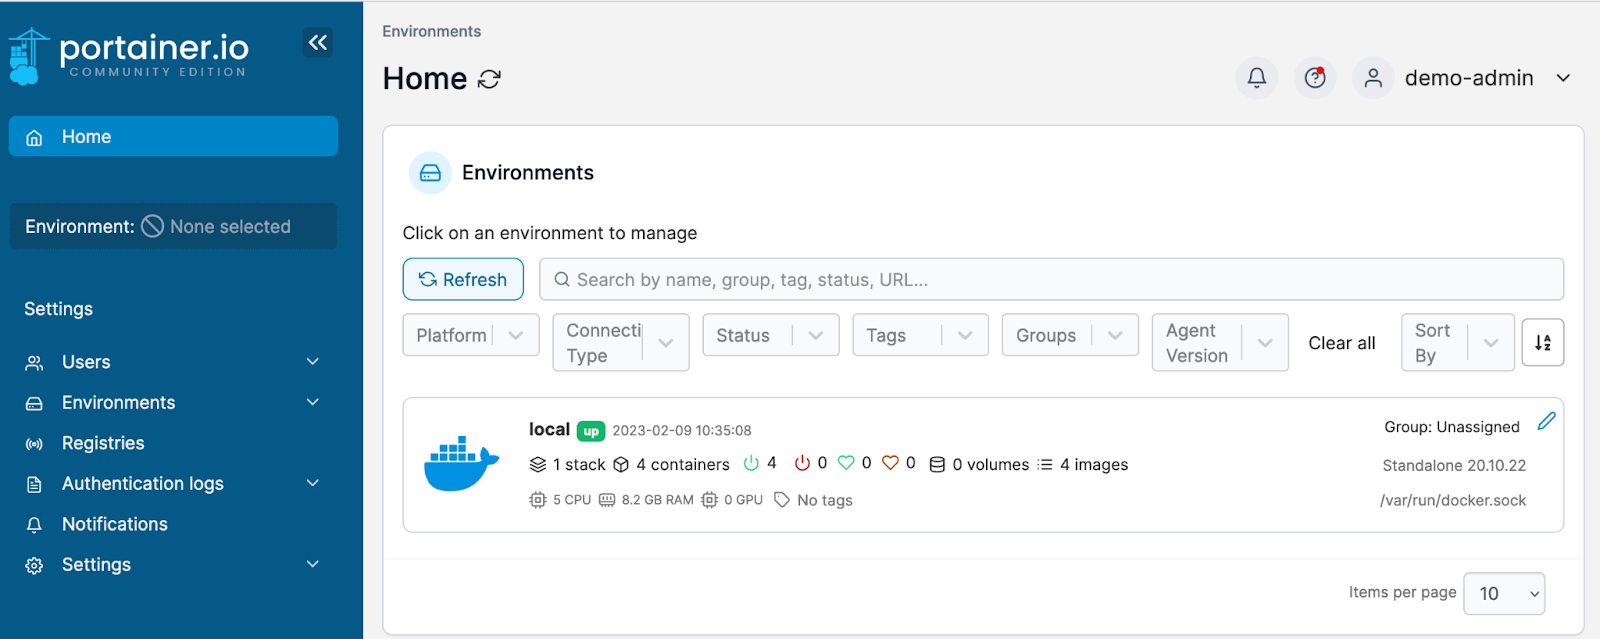
And that, folks, is how you successfully use Docker Compose to spin up Portainer!
Step III: Publishing Portainer
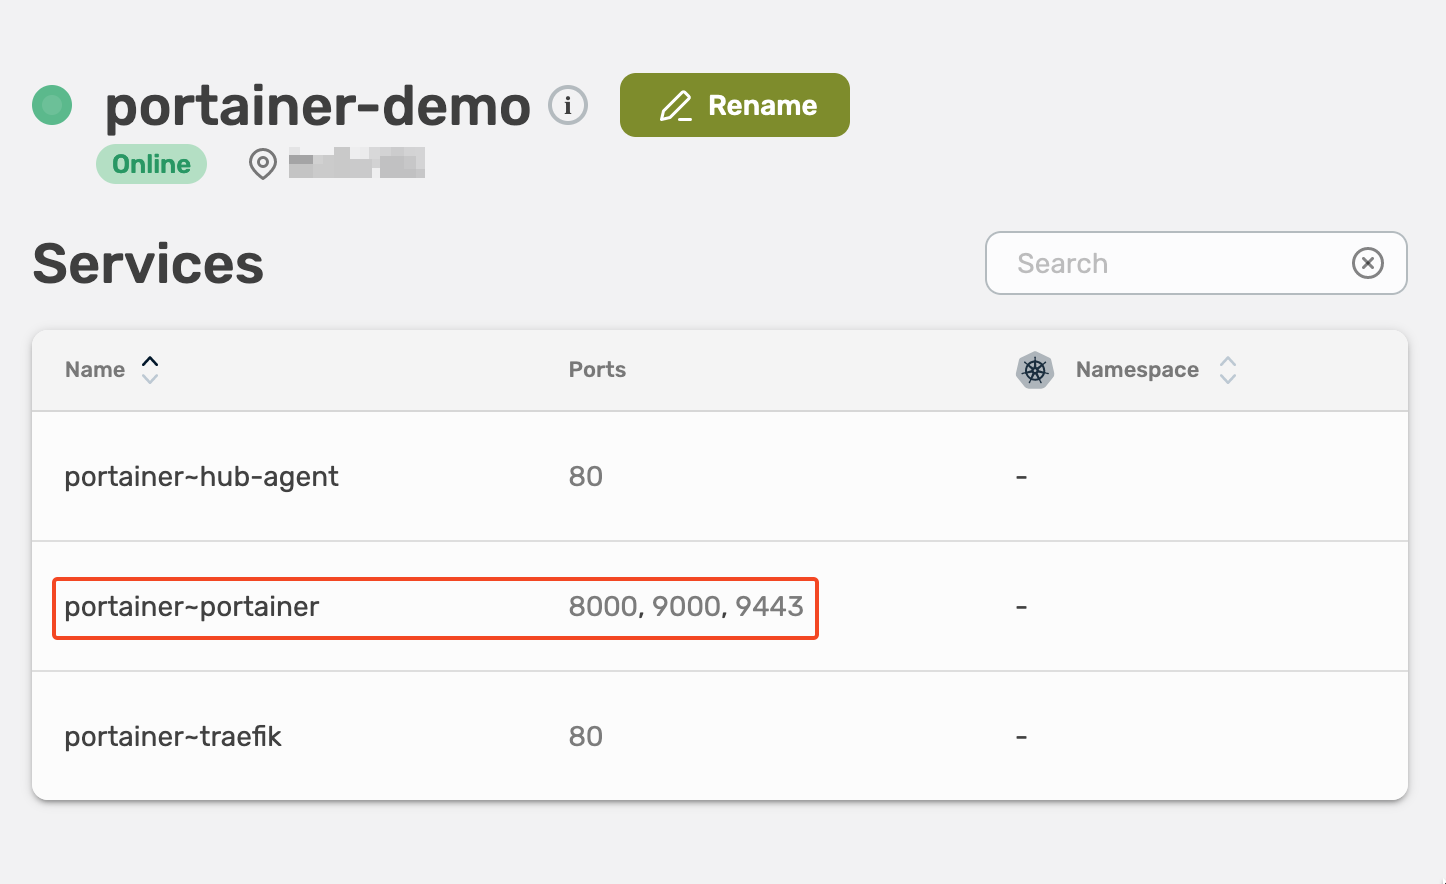
In the service overview in the Hub UI, you will see three listed services, all of them with the prefix portainer~.
portainer~hub-agentportainer~portainerportainer~traefik
These are the services that are configured in the two Docker Compose files. Your app’s network is given a name based on the project name, which is based on the name of the directory it lives in, hence the portainer~ prefix.
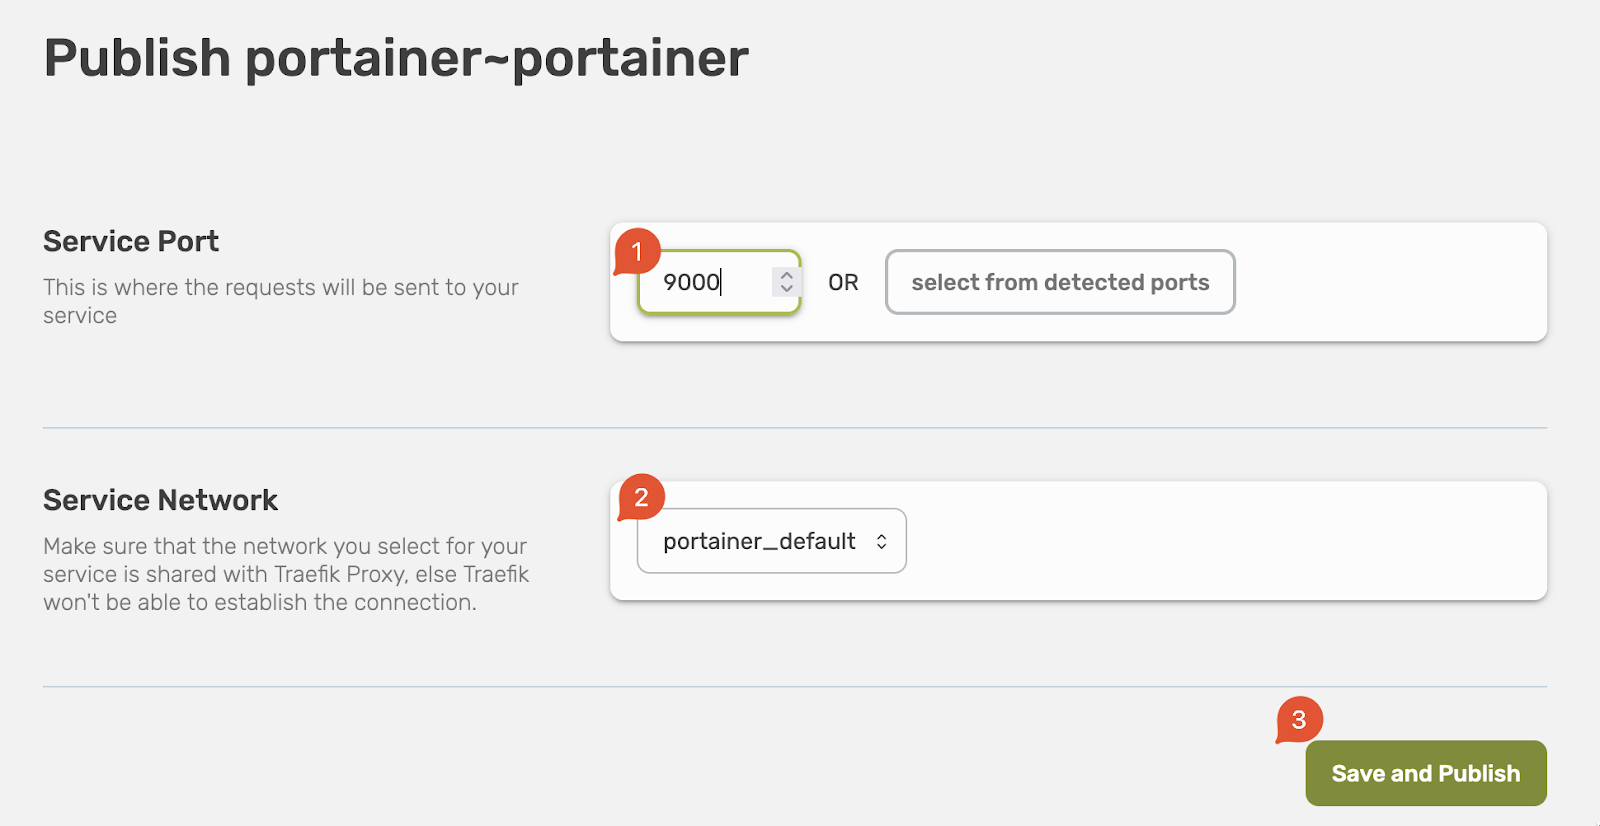
Select portainer~portainer under services — this is the Portainer instance you want to publish — and click Publish the service.
Note: Make sure to use port 9000; this is the port you configured in the Portainer Docker Compose file.
Traefik Hub will automatically create and use an SSL certificate for the connection.
By default, Docker Compose sets up a single network for your application. Each container for a service joins the default network and is both reachable by other containers on that network, and discoverable by them at a hostname identical to the container name.
Once again, your app’s network is given a name based on the project name, which is based on the name of the directory it lives in.
Appoint the network portainer_traefik-hub— which was created by Docker Compose — and select Save and Publish.
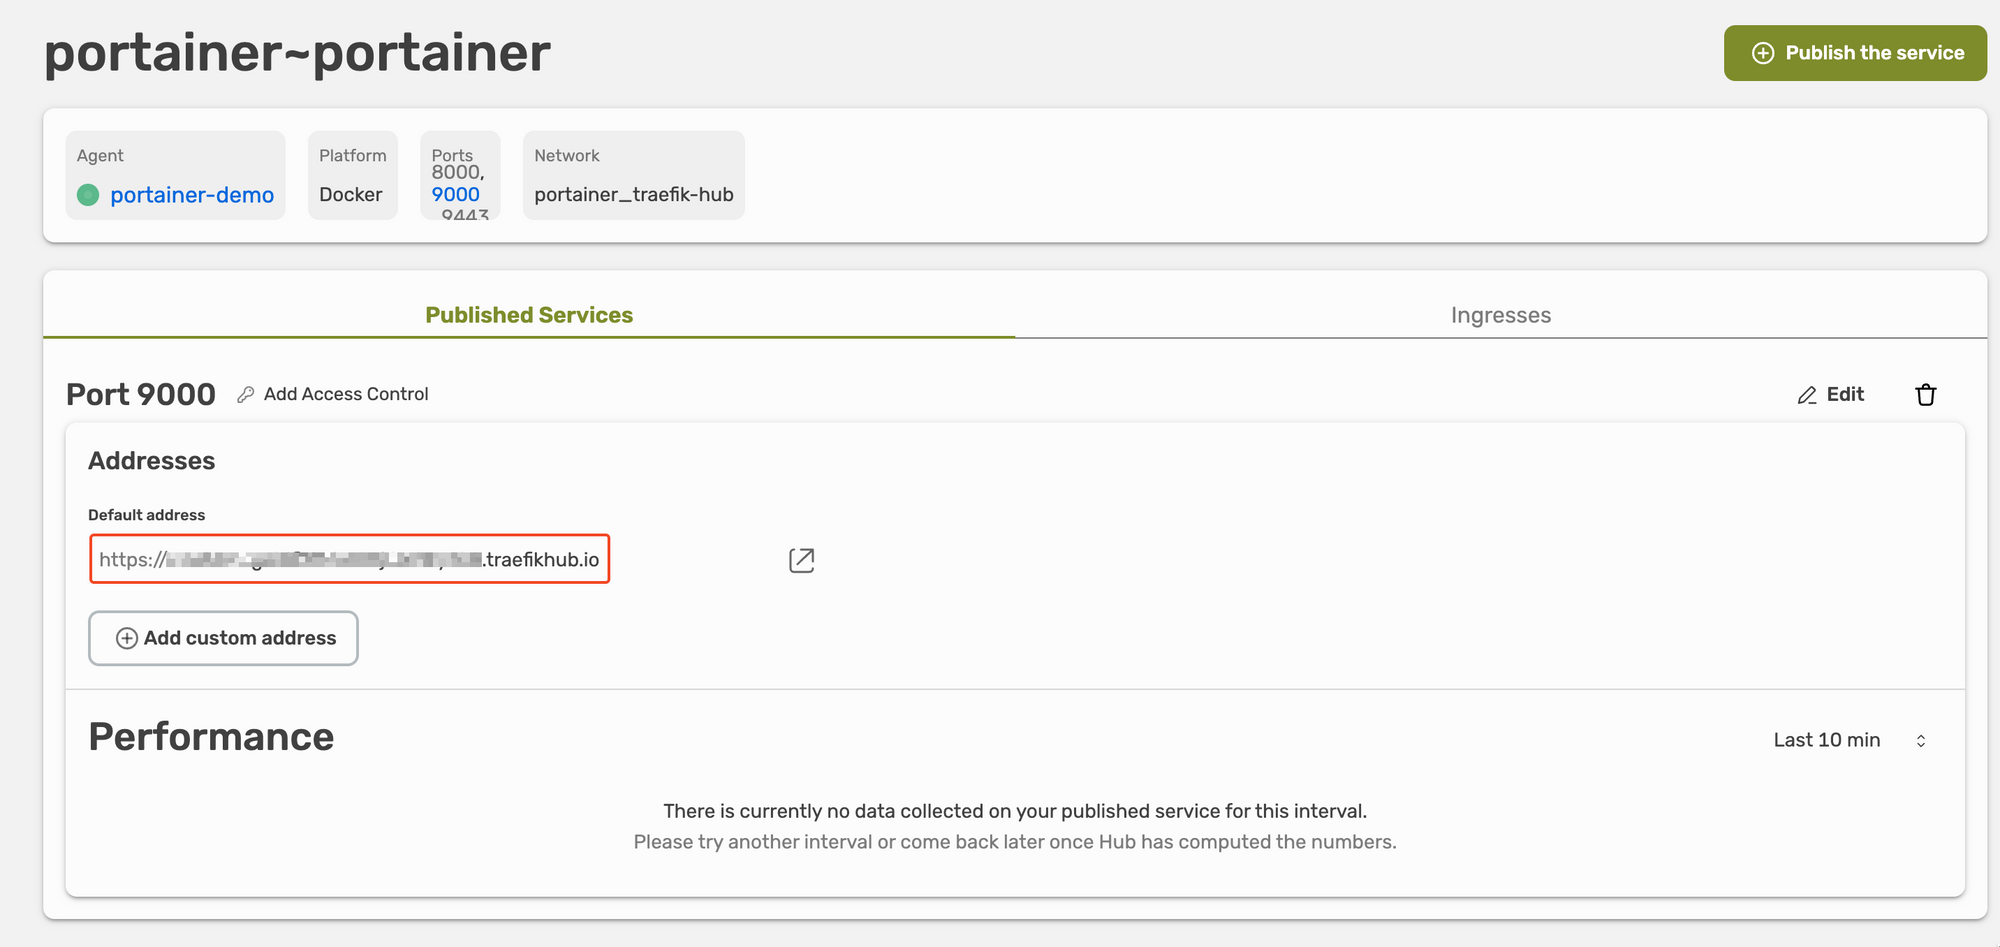
After a few moments, your service will be ready and published.
For the last part of this process, head over to the domain name shown in the UI and log in to Portainer.
Once you are logged in, you will see your Portainer dashboard.
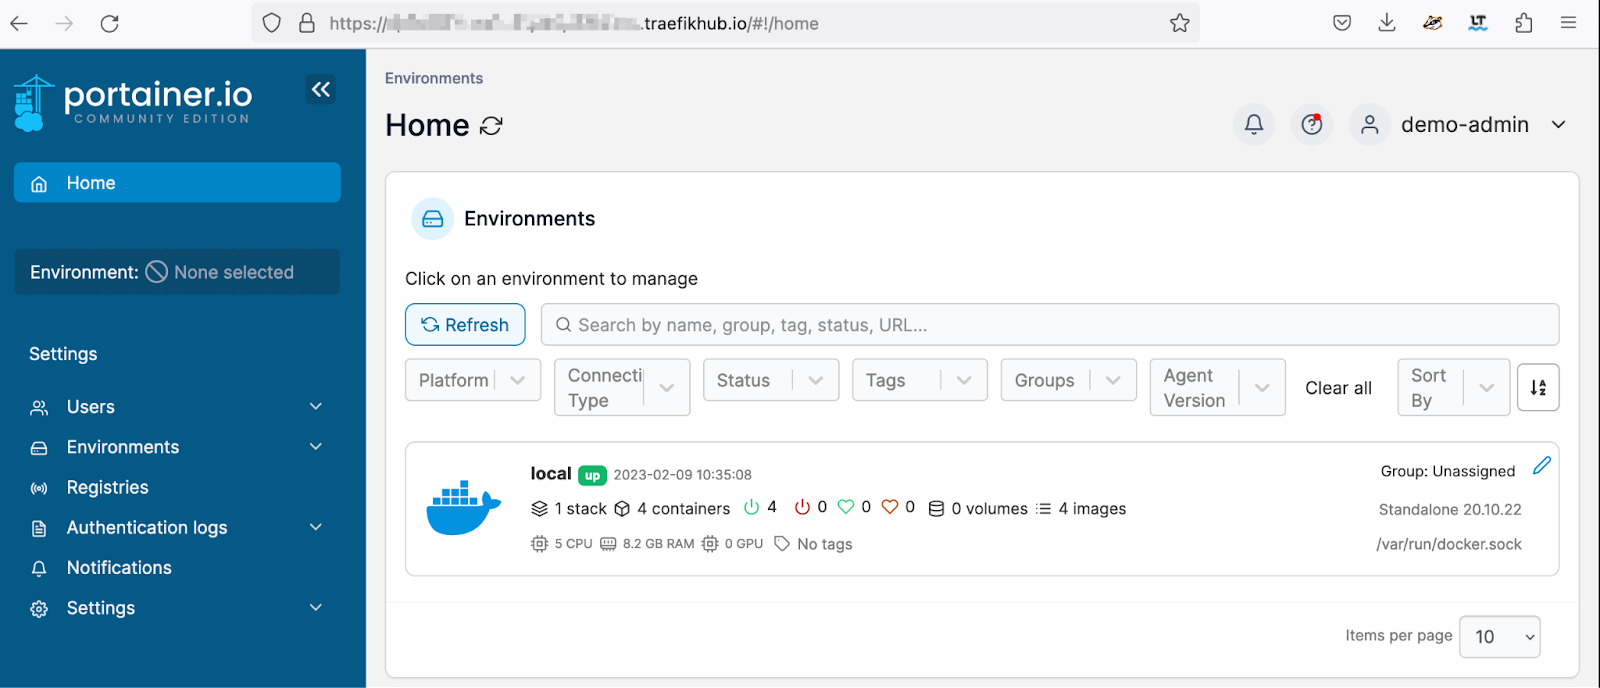
That’s all! You successfully deployed a Portainer instance locally and made it remotely accessible via Traefik Hub.
Check our documentation to learn more about using Traefik Hub with custom domain names.
A note about Access Control Policies
Currently, it is not possible to use one of Traefik Hub’s most awesome features, Access Control Policies (ACPs), with Portainer. The reason for that is the way authentication works in Portainer.
For more information, please check the related GitHub issues 3893 and 6866. Of course, we will update this article once these issues are fixed!
If you want to learn more about access control and Traefik Hub, I recommend your check out the following sources.
- Achieve Zero Downtime Access Control for Your Applications
- Traefik Hub in a World of GitOps
- Create a secured gateway for your applications